
WordPress and WooCommerce both have performance issues with their database structure. Installing Solr on Ubuntu 14.04 can make WordPress and WooCommerce search faster by bypassing the MySQL database and using Solr’s lightning fast lucene structure instead.
You will need root ssh access to your VPS or dedicated server to complete this tutorial.
Install Solr Ubuntu 14.04 for Faster WordPress Search
Installation overview
- Install Java
- Install Solr
- Optionally configure Solr to use local host and IPv4
Install Java
Like Elasticsearch, Solar requires Java. The lines below will install Java 8 on your VPS or dedicated server.
echo "deb http://ppa.launchpad.net/webupd8team/java/ubuntu trusty main" | sudo tee -a /etc/apt/sources.list.d/webupd8team-java.list
echo "deb-src http://ppa.launchpad.net/webupd8team/java/ubuntu trusty main" | sudo tee -a /etc/apt/sources.list.d/webupd8team-java.list
sudo apt-key adv --keyserver hkp://keyserver.ubuntu.com:80 --recv-keys EEA14886
sudo apt-get update
sudo apt-get install oracle-java8-installer -y
Accept Oracle’s license terms and Java will be installed.
Install Solr on Ubuntu 14.04
This will download Solr 6.3.0, there may be a newer version you can find from here. Replace the updated version URL below if necessary.
cd /tmp
wget http://mirrors.rackhosting.com/apache/lucene/solr/6.3.0/solr-6.3.0.tgz
Extract the bash installer script from the Solr package. Adjust the version solr-6.3.0 if necessary.
tar -xf solr-6.3.0.tgz solr-6.3.0/bin/install_solr_service.sh --strip-components=2Run the Solr installer and specify the Solr package version.
sudo bash install_solr_service.sh solr-6.3.0.tgzYou will see this output
Creating new user: solr
Adding system user `solr' (UID 113) ...
Adding new group `solr' (GID 120) ...
Adding new user `solr' (UID 113) with group `solr' ...
Creating home directory `/var/solr' ...
Extracting solr-6.3.0.tgz to /opt
Installing symlink /opt/solr -> /opt/solr-6.3.0 ...
Installing /etc/init.d/solr script ...
Installing /etc/default/solr.in.sh ...
Service solr installed.
Customize Solr startup configuration in /etc/default/solr.in.sh
* solr.service - LSB: Controls Apache Solr as a Service
Loaded: loaded (/etc/init.d/solr; bad; vendor preset: enabled)
Active: active (exited) since Tue 2016-12-06 12:47:27 UTC; 5s ago
Docs: man:systemd-sysv-generator(8)
Process: 3390 ExecStart=/etc/init.d/solr start (code=exited, status=0/SUCCESS)
Dec 06 12:47:13 ubuntu16 systemd[1]: Starting LSB: Controls Apache Solr as a Ser
Dec 06 12:47:13 ubuntu16 su[3392]: Successful su for solr by root
Dec 06 12:47:13 ubuntu16 su[3392]: + ??? root:solr
Dec 06 12:47:13 ubuntu16 su[3392]: pam_unix(su:session): session opened for user
Dec 06 12:47:27 ubuntu16 solr[3390]: [206B blob data]
Dec 06 12:47:27 ubuntu16 solr[3390]: Started Solr server on port 8983 (pid=3498)
Dec 06 12:47:27 ubuntu16 solr[3390]: [14B blob data]
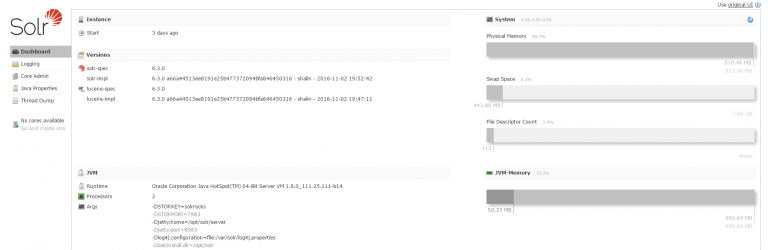
Dec 06 12:47:27 ubuntu16 systemd[1]: Started LSB: Controls Apache Solr as a ServSolr runs on port 8983 and has a management interface
Create Solr Index
Solr requires an index which we will create now by entering the solr binary folder
cd /opt/solr-6.3.0/binExecute this command to create a new index called wpsolr
sudo -u solr ./solr create -c wpsolr -forceCreating the new index created a folder /var/solr/data/wpsolr which we can now configure.
Download extracted from the WPSolr KB article
cd /var/solr/data/wpsolr/conf
wget https://www.wpsolr.com/download/solr-5-xx/?wpdmdl=2071 -O wpsolr-conf.zip
Install unzip
sudo apt-get install unzip -y
unzip wpsolr-conf.zip
Now when using a WordPress Solr plugin, your Solr index path should be /solr/wpsolr
Configure Solr Bind to Loopback
Open the Solar configuration file
sudo nano /etc/default/solr.in.shAdd this line so Solr binds to 127.0.0.1 – the loopback address
SOLR_OPTS="$SOLR_OPTS -Djetty.host=127.0.0.1"Restart Solr
sudo service solr restartCheck the loopback address is being used with netstat
sudo netstat -lntp | grep 8983If you see this line then Java may be preferring IPv6
tcp6 0 0 127.0.0.1:8983 :::* LISTEN 4168/javaThis isn’t quite right, you can tell Solr to prefer IPv4, open up /etc/default/solr.in.sh and add this line
SOLR_OPTS="$SOLR_OPTS -Djava.net.preferIPv4Stack=true"Restart Solr
sudo service solr restartIf you see this line then Java may have been confused out the IP addresses to use (IPv6 instead of IPv4)
tcp 0 0 127.0.0.1:8983 0.0.0.0:* LISTEN 4519/javaNow Solr is not exposed to the internet 🙂
Solr WordPress Plugins
Solr-Power is free so is a good starting point for testing.
WP Wolr Search Engine has a free version but if you want added functionality like WooCommerce or bbpress then you must pay for the premium extension.
Sources
How to Install and Configure Solr on Ubuntu 16.04
Change Bind Address of Solr
Change Jetty to Prefer IPv4
So nice that I added this tutorial to wpsolr’s official documentation links:
https://www.wpsolr.com/guide/configuration-step-by-step-schematic/install-apache-solr/
Very much appreciated Patrice! Thanks for all of your hard work and support to help make WordPress search faster 🙂